ART BTEC Header

ART BTEC Header

Saturday, 13 September 2014

Abstract Artist Research (IVAN'S GROUP)


You need to research and analyse at least 3 different abstract paintings by 2 different Artists (minimum of 6 paintings in total). The work should be thoughtfully presented over at least 4 sketchbook pages. Some suggested Artists to research are listed below. We will look at this work in a lesson on Friday (19th September) and it will be marked with the rest of the project when you hand in on Monday 22nd September.


Hans Hofmann, Howard Hodgkin, Albert Irvin, Gerhard Richter, Jackson Pollock, Willem de Kooning, Richard Diebenkorn, Cy Twombly, Gillian Ayres, John Hoyland, Fiona Rae.

Jackson Pollock at work

Gerhard Richter

Albert Irvin

Hans Hofmann

Willem De Kooning

RESEARCH

  1. Identify each Artist and include brief biographical details/background information.

  1. Find examples of artworks – get good colour copies, list dates, dimensions and media used.

  1. If you can find them, include quotations from the Artist. Try www.artquotes.net

ANALYSIS

  1. Give a detailed description of the artwork.

  1. Analyse – comment upon use of colour, composition, technique, scale etc.

WRITTEN RESPONSE

  1. Give an opinion on the Artworks, but ensure you justify what you say. Avoid simple value judgements (‘I really like/dislike…’) or vague, meaningless statements (’This piece is really effective’). Comment upon how successful or unsuccessful you find the artwork, and give specific reasons why you hold this opinion (I find this painting particularly successful due to the way in which the Artist has created a balanced composition by distributing the strong red colour evenly throughout the piece).

  1. What is the relationship between this work and your own? Identify and explain connections between this artist’s work and your own.


VISUAL RESPONSE

  1. It is important to also include your own visual responses to artists’ work. This can either be a copy of an artwork (or a detail of a work) with the purpose of analysing technique; a diagram or study that investigates certain formal elements of the artwork (composition, brushwork); or a piece of your own work that clearly uses some of the techniques, methods or aspects of this artist’s work.

OVERALL PRESENTATION

  1. Take pride in the overall presentation of your research, it should not be rushed. Consider each element carefully:  type, layout, titles, visual responses etc.

Tuesday, 9 September 2014

Drawing Homework (IVAN'S GROUP)


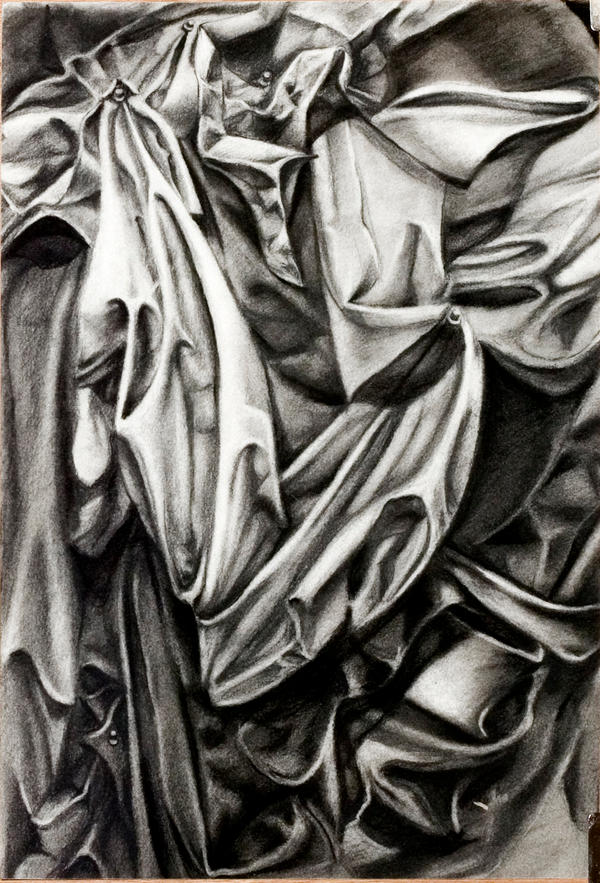
For the beginning of next week (15th September) you should make a sustained full page pencil tonal drawing from your still life photos. We will look at these drawings on Monday in a lesson.
Select a good photographic image and set your composition out carefully with a B/HB pencil in line then add a range of tones using softer pencils (2B - 6B), make sure your darkest tones use the full depth of tone you can achieve (press hard).
This should be a sustained piece that shows off your drawing ability to the full, you might use a rubber to help you pick out the highlights.

Sample Photo Joiner (FOR IVAN'S GROUP)


A few tips for when you do your photo joiners:
  • It helps to take your photos all from approximately the same position. Move the camera to capture different sections, rather than wandering around - otherwise you may end up with a set of very disjointed images.
  • Whilst you are going for a fragmented look if you vary the zoom or viewpoint too much the whole thing quickly becomes incoherent.
  • You will be surprised at how many photos you need to make an effective joiner, as there is inevitably some that aren't useful - I'd suggest a minimum of 30 shots.
  • I found for working at A3 scale selecting the "Wallet Prints" option from the printer wizard was the most effective - this gives you 9 images on an A4 printed page. 

Monday, 8 September 2014

Progress Checklist for Tools Project + Research (FOR PAUL'S GROUP)

By the end of Wednesday 16th September the work for the Tools project you should have completed is:


  • At least 1 sustained pencil drawing of your tool completed from direct observation.
  • A series of thoughtfully lit and composed photographs of your tool, best ones printed out at A5/A4 and put in sketchbook.
  • 2 or more other drawings of your tool in your sketchbook, these could be in pencil/biro/fineliner.
  • Expressive large scale charcoal and/or stick and ink drawings.
  • A3 chalk and charcoal drawing onto midtoned paper.
  • Minimum of one well finished carbon print.
  • At least one Gold Card plate cut and several prints taken from it.
  • A3 collage base drawing.
  • At least one good detailed monoprint.
  • One or more cut silhouette paper collages.
  • Minimum of 1 food dye and bleach experiment, working into a copy of an existing print/drawing.
  • At least 2 images created with spray stencils, try overlays and consider using photocopies of existing work as a base. 
  • 2 pages of research into an Artist who uses spraypaint (see separate post for more detail).
  • 4 pages research work into Jim Dine's Tool drawings and the Collage work of Florian Nicolle (see below).

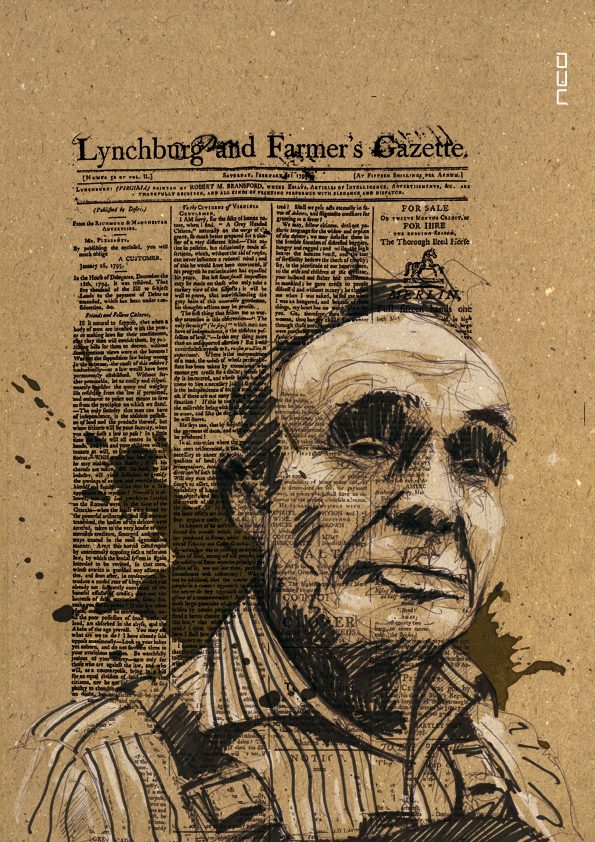
Two pages of research into the Tool drawings of Jim Dine and the same for the mixed media collage work of Florian Nicolle - find good reproductions of their work, give a brief bit of background information about each Artist, provide some analysis and personal opinion on at least 2 specific images by each of them and make at least one visual response of your own to each Artist's work (this should be an interpretation of your tool in the style of each Artist).
If you get the opportunity there is currently an exhibition of Jim Dine's work (including some of his Tools prints) at the Alan Cristea galleries on Cork Street in London (Piccadilly or Green Park tube). Have a great day out in London and enhance your Art education as a part of it - win, win!

Jim_dine_de_ten_winter_tools
Jim Dine

Florian Nicolle 02 23 Peppy Illustrations Drawn By Florian Nicolle
Florian Nicolle

For next week please bring in £2.50 as a contribution to group materials we will need to purchase for technique work (coloured dyes and spray paints).

WELCOME Class of 2014!


Welcome to a new year of students here at Alton - This Blog is the place to come for course news, to do lists, project information, practical tips, example work and  forthcoming events (trips etc.).

So here is your first project brief (FOR IVAN'S GROUP):


BTEC Extended Diploma 1ST YEAR PROJECT BRIEF.

PROJECT:  Colour.
SPECIALISM:  Fine Art (painting).

CONTENT:
Initially working from direct observation we will be exploring different aspects of colour by creating a series of images. Our visual reference material will be a still life made up with a variety of brightly coloured hanging drapes and objects. As we move through the project our focus will shift from observation towards more intuitive and abstract uses of colour. Over the course of the project we will use paint, photography, drawing media and collage techniques. We will enrich our understanding of how Artists approach abstraction through sketchbook based research.

Week 1: Observational Painting:
We will be producing 1 or 2 observational paintings on an A2 scale. Alongside this we will be undertaking some photography and making collages and drawings.

GUIDELINES for your Observational painting:
·         Think carefully about your composition, how much of the still life arrangement should you include to achieve the most visually stimulating image?
·         Look hard at what you are painting, you should visually analyse shapes, colours and tones and observe how they relate to each other.
·         Use paint with confidence, you need to approach your piece with energy and enthusiasm. Start with your biggest brush, and don’t be afraid of making mistakes.
·         Be imaginative in your interpretation of colour: Look for and exaggerate hints of colour within colours (e.g. cool blues in areas of shadow).
·         Mix colours do not use colours straight from the pot. When lightening and darkening colours use other colours other than black and white to do this (you should not need black at all).
·         Use your water to alter the consistency and quality of the paint, use a range of applications from thin washes to thick impasto.
·         Look around you and learn from the approaches of other people in the group.

Week 2: Mixed Media Abstraction
In the second week of the project we will produce a sustained A1 mixed media abstraction. Initially we will work rapidly with a series of different materials (charcoal, newsprint, paint, pastels, tissue, scrim and hessian), before spending time refining and balancing our final images. We will conclude the project with a group crit and produce a written evaluation.

GUIDELINES for your Mixed Media Abstraction:
·         Be bold and experimental with the range of materials available to you, ensure you utilise the range of mark making techniques these materials allow you to achieve.
·         After using the still life as a starting point try to put all thought of representation out of your mind, and work within an entirely abstract context.
·         Be aware of the decision making processes that go into producing a successful abstract composition, good abstract work does not occur through accidental means.
·         Use colour imaginatively, to lead the viewer’s eye, to provide an illusion of depth, to create mood and atmosphere etc.
·         Work on your image from all sides. Rotate it, try working flat and at an easel for different effects.
·         Change the consistency of the paint to change the character of the marks you make.
·         Use texture carefully, large build ups of material can easily unbalance an image.
·         Don’t be afraid of making mistakes or making radical changes to your painting.
·         Taking material away (e.g. tearing layers back) can be just as effective as adding to an image constantly.
·         Continue to mix colours and avoid the obvious.

 ASSESSMENT CRITERIA:
You will be marked on how effectively you:
·         Demonstrate confidence and skill in the handling of paint and mixed media.
·         Select and resolve compositions.
·         Observe and record.
·         Demonstrate understanding of techniques and concepts (such as spatial use of colour) and effectively integrate these into your practical work.

SUBMISSION REQUIREMENTS:
·         At least one well resolved A2 observational painting.
·         Fully finished A1 Mixed Media Abstraction.
·         A set of at least 20 photographs of the still life arrangement (print thumbnails of them all and include the best 3 or 4 shots as larger A5 printouts)
·         At least one photomontage/joiner based on the Still Life inspired by David Hockney’s work.
·         2 pages of research into David Hockney’s photographic joiners thoughtfully presented alongside your own analysis.
·         A sustained Tonal pencil drawing based on your still life photography in your sketchbook.
·         A collection of images (minimum 6) by abstract artists, thoughtfully presented in your sketchbook with analytical comments and visual responses.
·         Word-processed project evaluation (300-500 words).

REFERENCES:
For Photography: David Hockney.
Abstraction: Hans Hofmann, Howard Hodgkin, Albert Irvin, Gerhard Richter, Jackson Pollock, Willem de Kooning, Richard Diebenkorn.

DEADLINE: Monday 23rd September 4.30pm

...and here are details of your first research homework:


David Hockney Photographic Joiner Research

You need to find and print out at least 4 examples of David Hockney’s “Photographic Joiners” research this aspect of his work and analyse at least 2 of the images you have found in depth. This work should be thoughtfully presented over at least 2 sketchbook pages.

RESEARCH
  1. Title your pages with the Artist’s name, in this case David Hockney, you might consider using fonts available online from sites such as www.dafont.com
  2. Find good examples of Hockney’s photographic joiners – not paintings and not tiny jpegs that print out pixellated.
  3. Give a little background information on the Artist, when he was born, when he started to make his photographic collages and why.
  4. Include quotations from the David Hockney (ideally that relate to his photographic work). Try www.artquotes.net
ANALYSIS
  1. Give a detailed description of the artwork.
  2. Analyse – comment upon use of colour, composition, technique/media, scale etc.
WRITTEN RESPONSE

  1. Give an opinion on the Artworks, but ensure you justify what you say. Avoid simple value judgements (‘I really like/dislike…’) or vague, meaningless statements (’This piece is really effective’). Comment upon how successful or unsuccessful you find the artwork, and give specific reasons why you hold this opinion (I find this joiner particularly interesting because of the way in which the Hockney has explored mixing up different scales and viewpoints).
  2. What is the relationship between this work and your own? Identify and explain connections between this artist’s work and your own.
VISUAL RESPONSE

  1. We will be responding to Hockney’s work by producing our own Joiners based on the still life arrangement, look at how Hockney makes his images to help you create your own.
OVERALL PRESENTATION

  1. Take pride in the overall presentation of your research, it should not be rushed. Consider each element carefully:  type, layout, titles, visual responses etc.

Friday, 9 May 2014

Life Cycles - to do list

It is good to see that many of you have made a strong start to the new project. There has also been a little bit of late finishing of the illustration work, but this does need to be "put to bed" so we can all get focussed and productive with the graphics work.
Graphics really depends on 3 main ingredients:
  • Idea/message
  • Communication
  • Visuals
At this stage you really need to be exploring a wide range of initial ideas through brainstorming. Thinking about a personal concept/take on your life cycle (this is where the message bit comes in), then gathering visuals from primary and secondary sources that are going to allow you to communicate your ideas.
So the following need to be completed by the end of Tuesday 13th May:
  • Word association brainstorms for at least 4 different life cycles from the brief.
  • More detailed additional brainstorms for 2 Life Cycles - this is where you should try to develop an original theme based on your selected cycle.
  • Visual brainstorming (collected collage material) for 2 Life Cycles - at least 4 pages - mix text and imagery.
  • Notes and brainstorming for a first Photoshoot - go through what you need: props, make-up, model/s, location, lighting, posture, perhaps storyboard ideas for individual shots that you have.
  • Your first photoshoot - take at least 30 photos, print contact sheets of all your shots and blow 5 or 6 of the best ones up to A4.

Life Cycles Brief

BTEC EXTENDED DIPLOMA IN ART & DESIGN 1ST YEAR

ASSESSMENT CRITERIA


LIFE CYCLES - GRAPHIC DESIGN

RATIONALE

This project requires you use photography and create your own inventively manipulated imagery.  It encourages you to explore different visual language within Art & Design i.e. the difference between abstract figuration, collage and photomontage.  You will experience the area of Graphic Design, how to brainstorm, develop slogans, captions and take these through to a concept.

TIME:      

5 weeks taught time plus 4 weeks of study leave including half term.  

Project begins :       Tuesday 6 May – Friday  16th May (2 weeks)
Study Leave :                   Monday 19 May – Monday 9 June ( 2 weeks)

Timetabled Photography workshop lessons, bring sketchbook: 

Monday 9 June lessons on this day, Rm 522 (photography workshop using life cycles imagery)
Monday 16 June lessons on this day, Rm 522.   (ditto)

Normal Timetable resumes :

Thursday 19 June – Monday 8 July (3 weeks)
Introduction to UCAS writing personal statements and open days etc
College breaks up Thursday 10 July.( Personal statement, UCAS applications and holiday work set in last few days. 

AIM:

On the theme of ‘life cycles’ you are to produce a 6 sided leaflet on 1 stage in life (see list). Within the leaflet you will need to follow a grid format that will form part of your leaflet. You will use workshops within lessons to explore a wide variety of techniques and processes.

  • Week 1 and 2  before study leave-  brainstorming, research, development of concepts, photography shoots, drawing, workshop techniques       
  • Study leave – you will be set specific workshop techniques working from your photographs and some artist research. 
  • On your return 3 weeks developing producing mock ups, and resolving the leaflet, evaluation

Materials

You will need to pay a nominal amount towards specialist materials such as spray paint etc
Workshops in expressive and controlled drawing some of these during study leave:
                       
·         printmaking - monoprints, gold card, letterpress            
·         photography –  2 good shoots working within your theme, using dramatic lighting and extreme viewpoints.  You may use studio set ups or go to specific locations etc

·         sewing machine
·         acetate collage
·         spraypaint stencils
·         collage
·         image transfer with emulsion
·         photomontage
·         food colouring/ink and bleach
·         pencil/biro drawing
·         hand rendered slogans and sayings


LIFE CYCLES to choose from:


Birth
Parenthood
Toddler
Divorce
Teenager                               Midlife Crisis
Love                                       Retirement
Marriage                                Death


PROCEDURE:

Weeks 1, 2

  1. Produce at least 1 page of  initial brainstorming for at least  4 of the  life cycles

  1. Choose 2 to explore  in much more depth  and produce 12 pages ( 6 each) . This should include:  brainstorming, word association, mood boards, photographs, photocopies of objects, magazine cuttings, extracts from poems, slogans, observational drawings etc

Write down everything to do with an idea not just a single word but everything to do with that theme:  e.g. marriage could be brainstormed in the following way:  - an American Las Vegas styled marriage. 

Brainstorm: Las Vegas , the chapel of love, Elvis impersonator, side burns, 1 armed bandits, double your money, everyone a winner , poker, lots of tack gold, American flag, dollars signs, Stretch Limousine Cadillacs, wedding lyrics, four weddings and a funeral, white veil, Elvis white jumpsuit, renting a witness, best man, lady in waiting lyrics from songs about getting married, honeymoon suites, the film ‘Leaving Las Vegas’ and famous sayings from this.  All of these words could be visualised in varying imgery, textures, found objects and marks – make yours as exciting as possible!

When considering what to put down, try to avoid the ‘cut and paste’ syndrome of putting anything down and it looking obvious.  Try rather to select carefully and treat images by using processes to make more subtle statements.  Arrange your elements carefully before sticking and attaching these.

  1. Come up with a definite ‘concept’.  A concept is a strong idea that follows a particular slant on atheme and that could be interpreted in many ways, i.e. different ways to get married to might  be :- a tacky wedding ceremony  in  Las Vegas, an extreme parachuting/ bungee jumping experience or  ‘my big fat gypsy wedding’ TV documentary.

  1. Begin to generate ideas for a photo-shoot by producing planning  storyboards showing extreme viewpoints - close ups, low angle, high angle, things in and out focus, shadows, lighting, action and movement.  Make it achievable for yourself by using friends and family easily  available in locations that you can return to if necessary. This is needed in the first week – do not hang around take photos really quickly! Produce at least 1 strong  photo shoot of 10 images. Translate these images in class and at home.

  1. Select apt slogans to work with to relate to your life cycle and begin experimenting with techniques to enrich your work.   Begin to develop layouts, thumbnail sketches, using text along with image . Develop positive or negative slogans to accompany your images [brainstorm ideas in groups and on an individual basis]. 

RESEARCH TO BE DONE OVER  STUDY LEAVE
You will be set some practical tasks and :

  1. Research 3 well designed leaflets.  Photograph or stick in, or print off examples of creative leaflets you can find.  Look in the student union, music shops, retail shops to find examples of good layout. Annotate and answer the following:

  • How does information flow from one panel to the next?
  • How is colour, text and image unified?  Comment on the layout
  • Is there a regular position/scale/ for the text on the page?
  • How is the type face integrated or contrasted with the other imagery?
  • How is the front and back cover connected?
  • How many images are used?
  • What is the tone of the the message? ie fun and feel good, shocking and serious etc
  • Can you explain how ideas and images have they been cleverly put together?

ARTISTS

Look at one artist or designer from each of the 8 lists..  Collect information on each and analyse their work.  Answer the following questions:
  1. How have they composed their imagery?
  2. What media have they used?
  3. What processes and techniques have been included and what do you think about them?
  4. What mood, idea or concept does it reflect?
  5. Do you think the work is successful?  Why?
  6. What style would you say this work reflects?
  7. What makes this work interesting?
  8. Work in the style of at least 2 of these artists/designers and produce 4  images that reflect their work using some of your own photos.
9.      Have a look at http://www.handmadefont.com/ and look at the handmade fonts. Make your own homemade font and photograph each letter separately using found objects or materials on white paper. Make it appropriate to your idea and use materials that are fitting to your theme ie an addiction theme for  teenagers may be made up from cigarette butts.


ARTIST\DESIGNER REFERENCES

1.  Abstract Imagery
      Jean Michal Basquiat, John Hoyland,
       Howard Hodgekin, Sean Scully,
       Franz Kline, De Kooning, Jackson
       Pollock

2.   Representational  Drawing
       David Hockney,
      Jenny Saville, Egon Schiele, THS,
Kelly Roper, Tim Tomkinson, David Foldvari

3.   Collage
      Kurt Schwitters, , Katy Lemay
      Eduardo Recife, Sara Fanelli
       Dawn Dupree, Tim Marrs, Alex
       Williamson

4.   Photography.
      Bill Brant, Bill Viola, Martin Parr,
Cindy Sherman, Corrine Day, Olivero Toscani,  Mario Testino, Nick Maplin, Robert Mapplethorpe

5.  Pop Art
     Richard Hamilton, Peter Blake,
     Jasper Johns, Robert Rauschenburg,      Andy Warhol, Roy Lichenstein


6.  Linear Drawing
     Keith Haring, Michael Craig-Martin,
     Cy Twombly, Jasper Johns,
     Neasden Control Centre

7.  Photomontage
     Eduardo Paolozzi, John Heartfield, Raoul Haussmann, Helen Chadwick, David Mach, Terry Gillam

8.  Text
     David Carson, Fuel, Vince Frost,
      Why Not Associates, Tomarto, Neville
      Brody, Barbra Krugar, Tom Hingston,
Designers Republic

N.B before Study Leave you will be expected to clear out your drawers and take all work home. by Friday 16 May  Be warned anything left in drawers will be thrown!

On your return on Thursday 19 June  you will be assessed at this time to see if you have enough work to pass this stage to date on this project.  This is a formal assessment point and should be treated as seriously.  If you have any parts outstanding then you will be referred automatically. 
Forgetting your book or being absent without good reason is an automatic referral

Weeks 3, 4 and 5:

6.      Continue to develop ideas within workshop sessions.  Aim to have a considerable amount of experimental ideas. 

7.      Having developed your images begin to consider the format. You are to include a grid for one of your panels within the leaflet.The size of your Leaflet should be 28 x 14cms.  Within each Leaflet you should produce 1 page that is equally divided into 8 sections [each section is 7 x 7cms] This can be on any of the sides.It could be that the Leaflet is unfolded to reveal a central page or be any other of the panels  Other panels can be developed as you wish but must look appropriate to the 8 grid section.  For each of the boxes you should show a developed image using the following in any order:


·         Abstract:
An image showing a section, portion or heavily cropped image that has been developed using paint\expressive mark making.

·     Representational:
An image taken from observation or a photograph that resembles an object or figure.

·         Linear:
An image using line only but can involve colour and surface additionally.

·         Collage:
An image using found materials newspapers, magazines, fabrics, metals etc.

·         Pop Art:
An image which uses symbols, signs and other well understood images within our culture i.e. male ♂ and female ♀ symbols, x and y chromosomes, kisses xxx, targets, +,  =  signs  → ?  ♥   £  †  $,  icons of popular culture, film stars, pop stars, images of consumerism e.g. packaging labels, advertising, domestic appliances.

·         Photographic:
This includes photogrammes, location shots, studio set ups, black and white, colour, digital photography experiments with Polaroids.

·         Photomontage:
Collage using photographic imagery cut and pasted together.  Humorous or satirical images e.g. Monty Python’s Meaning of Life.

·         Text:
An image made up entirely from layered text using provocative statements, information, famous sayings, a line from a poem, personal important diary entry dates etc.  Your message should be clear and emphatic and come from your life cycle.

8.      Produce at least 2 mock-ups for your leaflet.  These should show scanned in print outs  showing sections, details, heavily cropped areas of interest etc.
9.       Cut your paper to scale  and start to draw onto this with the  6 sides with possible imagery that could be used.  Begin to consider how your leaflet will fold and complement its sides.  Imagery and text may flow, connect, contrast or complement colours and patterns.  Essentially you should try to create a compositional balance from one panel to the next. 

10.  Before you start printing, make sure you are completely happy with your outcome.  Let a tutor see your rough colour print outs before you print finally and make sure your sides fit together smoothly.

11.   Have a clean pristine area to stick your finals together - take your time.  Card should be used to sandwich between your print out.  Aim to have images stuck down on card on both sides.  These must be lined up accurately before you attempt to cut through all three layers. Areas to bend should be scored very carefully.  DO NOT USE PVA or Pritt Stick  use double-sided tape or photo mount.

MINIMUM SUBMISSION REQUIREMENTS

A full sketchbook.  The following should be inside:
§  6 pages each of initial word brainstorming and visual thumbnail diagrams, more indepth brainstorms and mood boards  drawings for the 2 life cycles. 12 pages in all.
§  8 pages of research on artists’ work with annotations and questions answered by the side
§  3 leaflets with  research answering questions.
§  25 pages of research, development and resolvement on your chosen life cycle. These pages should show logical development and differing ways of presenting layouts for your leaflets - i.e. mock ups, varying images together, differing captions etc.  This sketchbook should be highly annotated
§  1 final leaflet based on your chosen life cycle
§  800 word evaluation of design process, techniques, artist research, development and experimentation