ART BTEC Header

ART BTEC Header

Thursday 22 December 2011

Up to much? No.

Hellloo! 
Basically got a little bored and decided to put glow in the dark paint on my face....
(If you are trying to capture something that glows in the dark on camera it is better if you shine 'UV' light on it first to make it brighter!!!)

COOL. 
Hope you are all having a lovely break!!!!!! See you in the New year!! <3
Georgie xxxxx

Sunday 18 December 2011

Merry Christmas!!


                                   My Homemade Christmas Pink Penguin Snow Globe!!

                                                  (unfinished but i put it on here anyway)
                                                                            Alice x

Saturday 17 December 2011

The most amazing blog post EVER.

GEORGIE - 

Okaayyy, so I thought I would post on the blog - OUR BLOG NEEDS US!! Woohoooo!

 First of all,  I wanted to show my piece so far... I had to make a hat. Out of plastic cups! D:  


AND THEN I THOUGHT, 'HEY! I'm doing a photo shoot with some of my friends tomorrow (friday) and I should put some of the pictures on the blog to show their beauty to the world.' SOOO...


INTRODUCING DOMY, KAREN, VIKI AND JESS :) 
and Tom ;) trying to be manly...

From Left: Domy, Karen Viki, Jess! 


ARRGGG. manly Tom. 


Jess on a swing....


Some of them are really bad quality because of my shitty camera but ENJOY :) 
AND ....
MERRY CHRISTMAS BTEC!! 
Georgie xxx

Thursday 15 December 2011

Drinking Straw Fashion

 Okay so finally listening to Ivan and trying to blog a bit more. So here are some pics of my fashion design
 
i started first with just linking the straws together and incorporating wire to make the chain, i then decided to do the same for the bag.


Daniella x

AHHHH I GIVE IN IVAN!!!!

Ok, that picture scared me... I'm now becoming a regular blogger! Please people keep posting so we can move that scary picture down the page!! To make this post worth while i might aswell put up a picture of Charlotte wearing my top. Im pretty pleased with it :)

Laura H x

Wednesday 14 December 2011

Your Blog Needs You!

So I can see exciting garments taking shape in the studio and some of your PhotoShopped Fashion Illustrations were great, but the blog is empty.
Get your works of creative genius online, this is your gallery and the better your contributions are here, the more you are going to impress Universities and Art Colleges next year. 


So C'mon share your talents!

Sunday 4 December 2011

Photoshoot 4th December 2011

HELLOOOO! 

These are some pictures from a 'photoshoot' that me and Emma did today! :D 


GEORGIE XXXX

Emma-Jane and Georgie did a photo shoot


Thought I'd show some of my photography of Georgie, a little random but I might use these for our project :) PEACE OUT, Emma-Jane xx

Friday 2 December 2011

Updated "To Do" List

A complete list of what you should have completed before Wednesday 7th December, when we will be starting garment making and concentrating on that for the rest of term.
Read this list carefully and make sure you are putting maximum effort into finishing these items effectively before spending your time on any additional stuff!
  • Prezi Slides printed out at a decent size and included in your sketchbook.
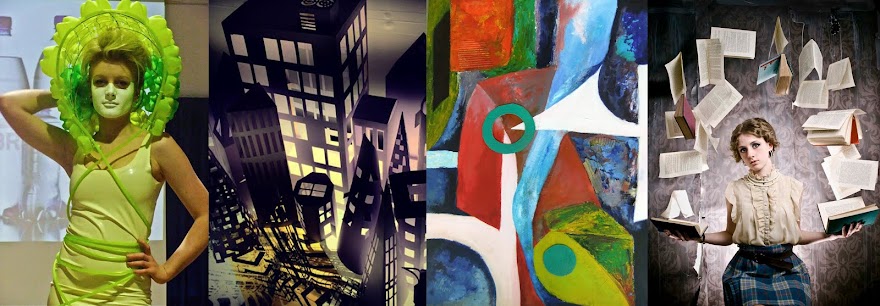
  • If your Prezi slides do not show good clear images of your Moodboards then include these as a separate item. Add any appropriate annotation to explain your ideas/intentions.
  • 2 pages of research on the recycled Fashion creations of Martin Margiela. Analyse some specific garments and provide some background information.
  • Complete Fashion Illustrator research, look at a minimum of 2 illustrations each by 3 different illustrators, write at least 200 words of accompanying analysis for each illustrator. http://www.art-dept.com/ is a good starting point for selecting your illustrators.
  • Include a range of your own photos of the figure that explore the kind of poses/posture found in Fashion Photographers work.
  • Several quick sketches of the figure from direct observation (done in class).
  • Select 2 of your own photos of the figure and reproduce these two images in the style of the 3 illustrators you researched – so, 6 illustrations in all. Make sure you use the same media as those employed by the illustrators whose work you are responding to.
  • At least 12 of your own garment designs sketched out and annotated. These should be quick pencil studies, use the figure templates and lightbox to save time. For each design you should be showing the back and front of the garment – so minimum 24 sketches in all. These sketches should be clearly labelled and annotated explaining materials you intend to use and construction techniques.
  • Having discussed your collection with students from the other group you should have chosen 3 designs to produce presentation standard illustrations of (including the design you intend to make). Refer back to your own figure photography to develop an illustration that is not dependent on a provided template. If you are clever you can produce one illustration that can be used as a personal template to show representations of all three of your design proposals. These 3 design illustrations should be completed in ink/paint/collage rather than simply pencil, so when they are scanned into PhotoShop they are substantial enough to work well when we add backgrounds and text etc.
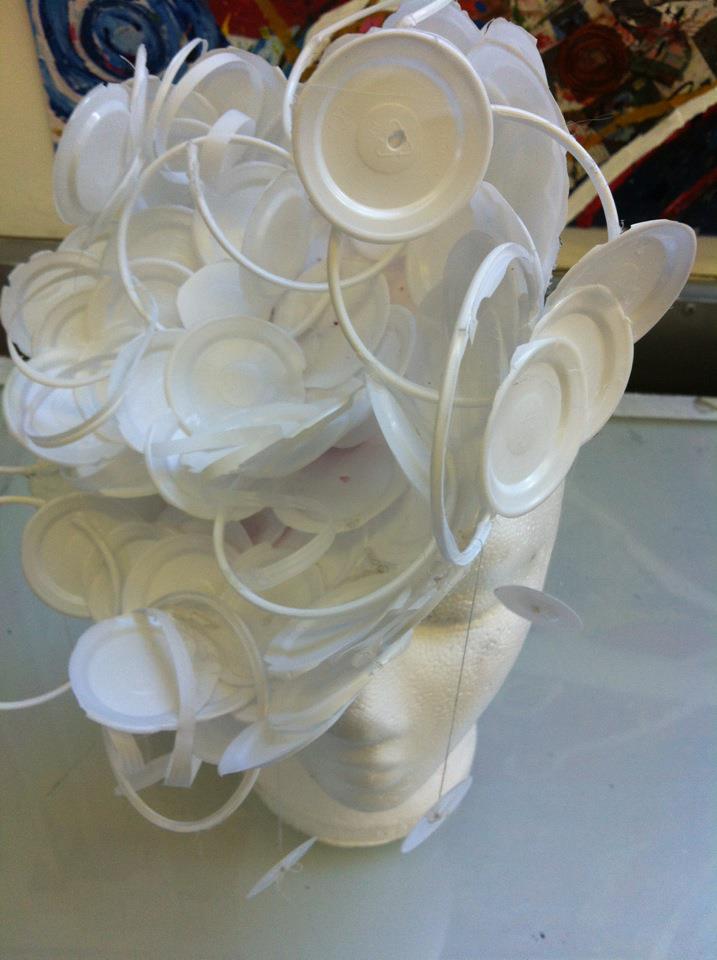
  • You also need to ensure you have obtained a relevant garment to alter and any additional materials (e.g. multiple clothes pegs, plastic bags, iron on transfer paper, threads, fabrics) you are going to require for the construction.
From having looked at a few sketchbooks today it is apparent that many of you are a long way from being up to date. You REALLY must accelerate now and put the hours in to catch up. This is a major project and anyone not completing the required elements will not pass. Failure to pass major projects like this one will prevent you progressing into the second year.
If there are students who do not successfully complete this assignment I will be making appointments for these individuals with Jon Myers (Senior Tutor). I would prefer NOT to do this!
Remember you are on the course because you are talented people with ambitions to work in the creative industry. This should be fun, but alongside that the sooner you get into professional habits the more successful you will be.
Let’s make some fantastic garments, I look forward to seeing your designs become reality!

Wednesday 30 November 2011

Tuesday 29 November 2011

Fashion Project - What Next?

OK, so you have looked at, analysed and made responses to a series of illustrators and you have a range of your own photos of the figure to work with.
Before producing your final illustrations you need to turn your mind to the designing process.

Stage 1 - Design Development
To speed things up at this stage we have supplied you with figure templates, back and front. Obtain plenty of copies of the templates and sketch over them rough ideas for your garments. You should produce 12 - 20 Design proposals in this way - for each one illustrate the front and back of the garment.
These Designs can be radically different to each other or closely related variations on a theme, you might come up with three basic designs and then illustrate several alternate versions of each of these.
Your illustrations are just working drawings, they do not need to be highly polished, we want you to produce ideas quickly, so do not labour over creating perfect images at this stage. You should however annotate your drawings with notes and labels - e.g. "Iron on transfer to be used here -->", "This fabric to be dyed blue -->"
Remember your designs need to integrate some element of the garment you have obtained and need to include (either literally or by visual reference) your everyday object. Whilst it  is also important to be
You should complete these garment design sketches before the start of your first lesson on Thursday.

Stage 2 - Collection Consultation
Once you have these Designs completed it is ESSENTIAL to speak with all the other students (in both groups) who have the same object as you.
These conversations should take place on Thursday.
You are designing a collection and before you finalise your garment proposals you need to check that they will actually look good together on the catwalk. This may mean modifying your designs at this stage, perhaps changing colours or garment shapes.

Stage 3 - Final Illustrations
Having selected your three best designs in consultation with the rest of the
team working on your collection you now need to produce finished illustrations for these three.
These should be YOUR OWN DRAWINGS based on your figure photos and using the knowledge gained from researching the Fashion illustrators to help you achieve fantastic results. At this stage you need only illustrate one view of each garment.
Scan your final design drawings into PhotoShop and add text and backgrounds to give a professional result. See the example below.

ALL THIS WORK NEEDS TO BE COMPLETE FOR MONDAY 5TH DECEMBER, SO WE HAVE 2 FULL WEEKS TO WORK ON GARMENT CONSTRUCTION.

Remember you need to be collecting the materials you require for your final piece, bring these with you on Monday.

Good Luck,

Ivan

Monday 28 November 2011

Combining PhotoShop with Drawing, the route to success!

As a development from my post on PhotoShop, here is what you can do when you add a little drawing into the process. 


 I started with one of your photos (thanks for posting Georgie)


I then elongated the photo slightly in PhotoShop, printed this out and using a lightbox created a pencil structure for my illustration. As I wanted the illustration to be a potential template for a variety of designs I simplified down to the underlying body shape, I then used fineliner and some acrylic washes to complete the drawing.


I then scanned my illustration into PhotoShop, and using techniques similar to those detailed in my previous post created a garment illustration. With this template I could relatively quickly produce a series of design proposals.

It's not rocket science, but remember the better the drawing you scan the better the final result will be!

Ivan