ART BTEC Header

ART BTEC Header

Thursday 27 September 2018

TOOLS PART 2 End of week 1


We are coming to the end of the first week of the Tools Part 2, where we have been concentrating on working through a range of techniques. This weekend you should spend some time presenting and briefly annotating the work you have done so far in your sketchbooks.
A checklist of what you should have for the project so far is included below:
  • Well presented research into Florian Nicolle (collages) and Jim Dine (tool drawings), thoughtfully presented over at least 4 sketchbook pages and including sensitive visual responses to each Artist.
  • A series of dramatic photos of a single hand tool - print out contact sheet thumbnails of your whole shoot and include some of your best images (4-6) printed at A5 or A4.
  • A well finished sustained piece of tonal drawing from your tool (full page).
  • One or more good Mono printing print images based on your tool photos. 
  • One or more gold card prints 
  • Any quick sketches completed in class 
  • Pencil and chalk quick drawing 
  • Fine liner and tipex drawings
  • Biro drawings
  • As extension work it would be good to add diversity to your drawing by experimenting with other media, e.g. expressive ink work, fine liner or biro sketches.
  • Stencil cut with Amanda 
Next week please bring £3 each as a contribution to materials for the project (the Spray Paints are the main specialist resource we need to fund), Thank You.

Techniques we will aim to cover next week are:  spray stencil and developments from these , acetate collage, carbon paper and Photo Shop image manipulation.

Monday 24 September 2018

Tools Part 2 Supporting Research

For homework you need to research the Artist's detailed below, refer back to the post below (on Hockney's Joiners, for tips on structuring the written content and presentation of research). You should complete this work by Monday 30th September at the latest.

Two pages of research into the Tool drawings of Jim Dine and the same for the mixed media collage work of Florian Nicolle - find good reproductions of their work, give a brief bit of background information about each Artist, provide some analysis and personal opinion on at least 2 specific images by each of them and make at least one visual response of your own to each Artist's work (this should be an interpretation of your tool in the style of each Artist).


Jim_dine_de_ten_winter_tools
Jim Dine


Florian Nicolle 02 23 Peppy Illustrations Drawn By Florian Nicolle
Florian Nicolle


Sunday 23 September 2018

Tools Project Part II

BTEC EXTENDED DIPLOMA in ART & DESIGN
1st YEAR PROJECT BRIEF

PROJECT– Tool Part 2
SPECIALISM: MIXED MEDIA/TEXTILES 


TIME: 2 Weeks
MATERIALS: Mixed Media
RESOURCES: sewing machines, drawing materials, spray paints, printing press and photocopier/IT.

ASSIGNMENT OUTLINE:
This project aims to familiarise you with a range of new techniques that can be used to develop your imagery throughout the Course.
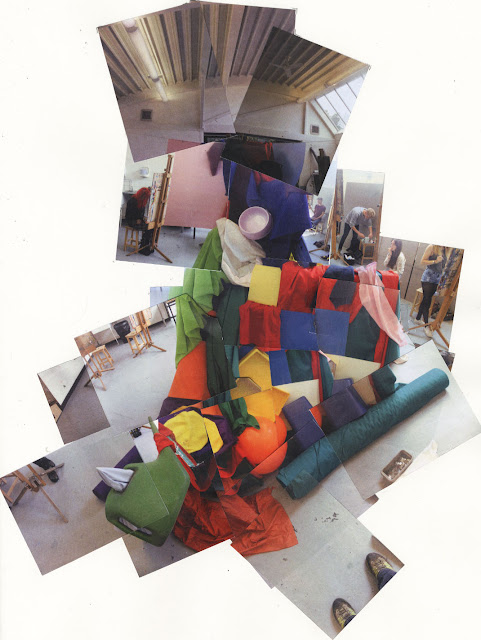
Using a basic hand-tool as your starting point, you are required to produce a body of work, which represents your object in a number of different ways. We will build on drawing and printmaking skills and explore processes such as Collage, Spray Stencil, Heat Press, Photography and PhotoShop.

GUIDELINES
  • Having selected an appropriate hand-tool (this should be an object which has a number of different working parts, textures, different materials in it’s construction, interesting negative shapes and strong structural elements). A mechanical hand whisk, hand drill or ‘lazy-fish’ corkscrew would all be good choices - you should begin by carefully examining and scrutinizing your object through sustained drawing; visually recording its basic construction and trying to understand exactly how it works and what it is used for.
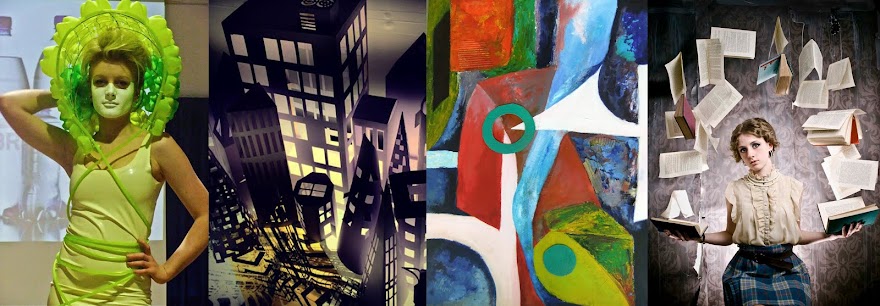
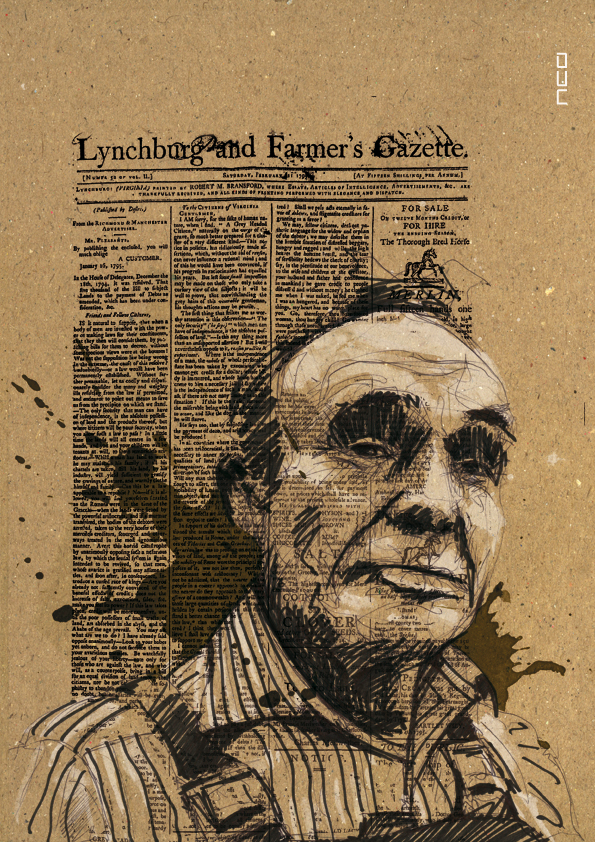
  • In order to get a real feel for your object you should produce a range of studies in a sketchbook, initially in pencil, which are the product of some careful observation and strive to record the different surfaces and textures that your object might possess as effectively as possible. Try to use relevant pencil grades and mark making in this process – for example, plastic handles might be better tackled with a softer B pencil, whereas metal blades would be more realistically documented through harder F/H pencils. Vary your scale and vantage point for each drawing, this will allow you to produce a good range of outcomes and also help you to produce the best images for the technique work that comes later on. At this stage you should also look at a range of artists who are particularly well known for their use of drawing as a means of recording an object. In order to do this properly, you should include visual responses and coherent written analysis which considers their use of mark making technique, exploration of line and tone how successful these are and how you might adopt the same methods yourselves. Good people to look at include Jim Dine and Florian Nicolle. 
  • Using your camera to record your object will also allow you to develop some interesting imagery which could be manipulated through IT later on. Take close-ups as well as long shots.
  • Once you are happy with your initial studies, start to introduce some more adventurous and unusual drawing techniques/materials. Consider colour and some more expressive ways of recording what you see in front of you.
  • You will be introduced to a number of new processes (printmaking and spray stencil for instance) and you will need to include examples of these in your sketchbook.  
  • As the project progresses you will be encouraged to explore techniques such as photocopying, collage and stitching to create further imagery. Again, record all outcomes in your sketchbooks together with examples of the work of others who use such techniques in their own work, details of suggested research will be posted on the Blog.
MINIMUM SUBMISSION REQUIREMENTS:
1 x sketchbook

REFERENCES:
Use the library and the internet in order to source this information – this will help to develop your individual research skills and vary the research material obtained. Lists of appropriate individuals may be given at certain points of the project to help you.

Thursday 20 September 2018

Tool Photography Homework

HOMEWORK TASK:
For the Tool technique work you will be starting next week you will need a range of photographs of your Tool. 
Choose your Tool thoughtfully, complex tools with moving parts work best e.g. Secateurs, Corkscrews, Tin Openers.
Make your photos as dramatic and interesting as possible, use a clean background that doesn't distract from the Tool. Zoom in, choose unusual angles and consider cropping and viewpoint carefully. You should set up directional lighting (torch or anglepoise lamp) that allows you to create cast shadows and distinctive highlights.
Take 15 - 20 shots and print 4 - 6 of the best at A4 or A5 scale. 
Ensure you have the photos printed and ready to work from on Monday 24th September.
Here are a few sample shots to give you the idea:


Tools Interim Marking Checklist


We are now at the midway point of the Tools project and are about to move onto a series of technique based experiments based upon a single tool.
Remember you need your single, complex tool and photos for Monday. You will also need a range of drawing pencils and an eraser.
We are going to take in sketchbooks on Monday to give you an interim grade for the Tools project, as it is useful for you all to have an early indicator of how you are doing. We will give you grades for Effort, Process (sketchbook) and Outcome (studio work) and a short feedback comment, more detailed feedback will be given after the completion of the second part of the Tools project.
The work you need to submit by 4.15pm on Monday 24th Sept is:

  • From the still life arrangement, a well finished chalk and charcoal A1 drawing (worked from a mid tone base).
  • Also from the still life a limited palette A2 mixed media and painted piece. Again make sure this is well finished, use your own time if the class time dedicated to this hasn't been enough to fully resolve your image.
In your sketchbook:


  • Photographs of both your charcoal and limited palette mixed media piece.
  • David Hockney Joiner research (see separate blogpost).
  • At least 2 of your own joiners based on the still life.
  • Homework tonal pencil drawing based on the still life, revisit these and push them further if you know there is room for improvement.
  • Gold card plate and prints from it mounted into your book.
  • Brief annotation of all your work, charcoal, limited palette piece, joiners and prints explaining strengths and weaknesses of your pieces.  

Tuesday 18 September 2018

Still life Charcoals from some of you.....


Don't worry if yours isn't shown, they are all fabulous!
Amelie Caddy

Andrew Sviridov

Harrison Jones


Annabel Skilton

Phoebe Repp

Laurie Mason


Thursday 13 September 2018

Hockney Joiner Research

Photo Joiner by Hockney - Portrait of his Mother

You need to find and print out at least 4 examples of David Hockney’s “Photographic Joiners”. Research this aspect of his work and analyse at least 2 of the images you have found in depth. This work should be thoughtfully presented over at least 2 sketchbook pages.
The work will be assessed as part of your project submission, you need to finish it by Wednesday 19th September, as there will be fresh homework tasks next week.

RESEARCH

  1. Title your pages with the Artist’s name, in this case David Hockney, you might consider using fonts available online from sites such as www.dafont.com

  2. Find good examples of Hockney’s photographic joiners – not paintings and not tiny jpegs that print out pixellated.

  3. Give a little background information on the Artist, when he was born, when he started to make his photographic collages and why.

  4. Include quotations from the David Hockney (ideally that relate to his photographic work). Try www.artquotes.net

ANALYSIS

  1. Give a detailed description of the artwork.

  2. Analyse – comment upon use of colour, composition, technique/media, scale etc.

WRITTEN RESPONSE


  1. Give an opinion on the Artworks, but ensure you justify what you say. Avoid simple value judgements (‘I really like/dislike…’) or vague, meaningless statements (’This piece is really effective’). Comment upon how successful or unsuccessful you find the artwork, and give specific reasons why you hold this opinion (I find this joiner particularly interesting because of the way in which the Hockney has explored mixing up different scales and viewpoints).

  2. What is the relationship between this work and your own? Identify and explain connections between this artist’s work and your own.

VISUAL RESPONSE


  1. You will be responding to Hockney’s work by producing our own Joiners based on the still life arrangement, look at how Hockney makes his images to help you create your own.

OVERALL PRESENTATION


  1. Take pride in the overall presentation of your research, it should not be rushed. Consider each element carefully:  type, layout, titles, visual responses etc.

Wednesday 12 September 2018

Photographic Joiners


PHOTOGRAPHIC JOINERS
 FOR AMANDA'S LESSON FRIDAY 14TH SEPTEMBER  

Don't forget to bring cameraphones/download/charging cables/sketchbooks Pritt stick (or money for this £1) in with you,   


You will also need to ensure you have some printing credit (or bring money to put some on your student card).


A few tips for when you do your photo joiners:
  • It helps to take your photos all from approximately the same position. Move the camera to capture different sections, rather than wandering around - otherwise you may end up with a set of very disjointed images.
  • Whilst you are going for a fragmented look if you vary the zoom or viewpoint too much the whole thing quickly becomes incoherent.
  • You will be surprised at how many photos you need to make an effective joiner, as there is inevitably some that aren't useful - I'd suggest a minimum of 30 shots.
  • I found when working at A3 scale (for final joiner collages) that selecting the "Wallet Prints" option from the printer wizard was the most effective - this gives you 9 images on an A4 printed page. 


Monday 10 September 2018

Homework Tools part 1


Homework Drawing Task
Week 1 Monday 10th September


To complement the work we are doing in class you should make a sustained full page pencil tonal drawing working from photos taken of the still life arrangement. You should aim to spend 4-5 hours on this drawing and complete it by Wednesday 20th September (it will be assessed as part of your project).
Select a good photographic image that is relatively complex (probably best to get something from a different viewpoint than your chalk and charcoal drawing). Set your composition out carefully with a B/HB pencil in line then add a range of tones using softer pencils (2B - 6B), make sure your darkest tones use the full depth of tone you can achieve (press hard).
This should be a sustained piece that shows off your drawing ability to the full, you might use a rubber to help you pick out the highlights.

If you have not yet completed the Anna Held Audette work then please do so in the next few days.  Please show me or Annie at the latest by Thursday 13th September.  


Friday 7 September 2018

TOOLS PROJECT PART 1

BTEC Extended Diploma 1ST YEAR PROJECT

Jim Dine

Anna Held Audette - Scrap Metal


PROJECT:  Tools (Part 1).
SPECIALISM:  Fine Art.

CONTENT:
Working from direct observation we will be exploring a variety of media and approaches to image making. Our visual reference material will be a structural still life featuring Tools and other objects. We will start with some large scale sustained observational drawing, as we move through the project our focus will shift towards more expressive techniques. Over the course of the project we will use various drawing media, photography, paint and collage techniques. We will enrich our understanding of how Artists approach observational work through sketchbook based research.

Week 1: Observational Drawing/photomontage:
We will be producing a sustained observational drawing using Chalk and Charcoal on an A1 scale. Alongside this we will be undertaking some photography and creating some David Hockney style photographic "joiner" collages.

Some Pointers for your Observational drawing:

  • Think carefully about your composition, how much of the still life arrangement should you include to achieve the most visually stimulating image? Don't go for an easy option, challenge yourself
  • Look hard at what you are drawing, you should visually analyse shapes and tones and carefully observe how they relate to each other.
  • Start by mapping out your composition in line, then start adding tone. Often it is easiest to start the tonal work by identifying the extremes of light and dark, ensure you establish these tones boldly, then start looking at the subtleties of tone in between.
  • Use the charcoal and chalk with confidence, you need to approach your piece with energy and enthusiasm, don’t be afraid of making mistakes. 
  • Look around you and learn from the approaches of other people in the group.
Week 2: Expressive Approaches
In the second week of the project we will explore further media and approaches to image making, working quickly to produce a range of pieces. We will aim to use ink, paint and collage to produce these images. Further guidance will be given as we tackle these pieces.

ASSESSMENT:
You will be marked on how effectively you:

  •      Demonstrate confidence and skill in handling media.
  •   Show willingness to experiment and embrace new approaches enthusiastically.
  •      Select and resolve compositions.
  •      Observe and record.
REFERENCES:

For Photography: David Hockney.
For Still Life/Tools: Jim Dine, Chaim Soutine, Euan Uglow, Anna Held Audette.


Welcome to the BTEC Extended Diploma 2018!

Hi Everyone,
I hope you are all feeling excited about starting the Art BTEC at Alton College on Monday!  We are really looking forward to meeting you all again and having a productive start to the term.  On our first day we will be starting some practical work, we'll be using charcoal and it could get messy, so don't wear clothes you feel too precious about (good to avoid delicate or light coloured garments).

Useful things to bring on day one are :
  • A chunky eraser (or 25p to purchase one from us)
  • £3 for an A3  sketchbook for your first project
  • An old shirt or apron for working in
  • 'Getting Ahead' work  

We will supply Charcoal and paper etc.  
Teaching staff for the first year BTEC are Charmian, Annie  and Amanda,  you'll meet us all on the first day.  Annie and Charmian will be your Tutors this year.

Both first year groups will meet in Room 855 at 10am to start the day and distribute timetables, and give you some important information about studying at college. Later, when we start work we'll also be using studio 815, these two rooms will be the first year base rooms throughout the year
I hope you've all had a fantastic Summer and you are now keen to get started.  Have a great weekend and we will see you Monday. 

Charmian 😊